
Presenter mode
An audience window with the slide, a presenter window with the next slide and your notes, keys, and a break countdown.
Present in the workspace header, Present › Start Presenting or ⌥⌘P starts presenting the open deck from the current slide. Two windows open.
The two windows#
- The audience window is borderless and black, with the slide filling the screen. It goes to the first screen that is not the main screen: the projector or the external display.
- The presenter window stays on the main screen, titled Presenter, and can be moved and resized.
With one screen (a laptop on its own, or a laptop mirrored to the projector) the layout changes; see One screen below.
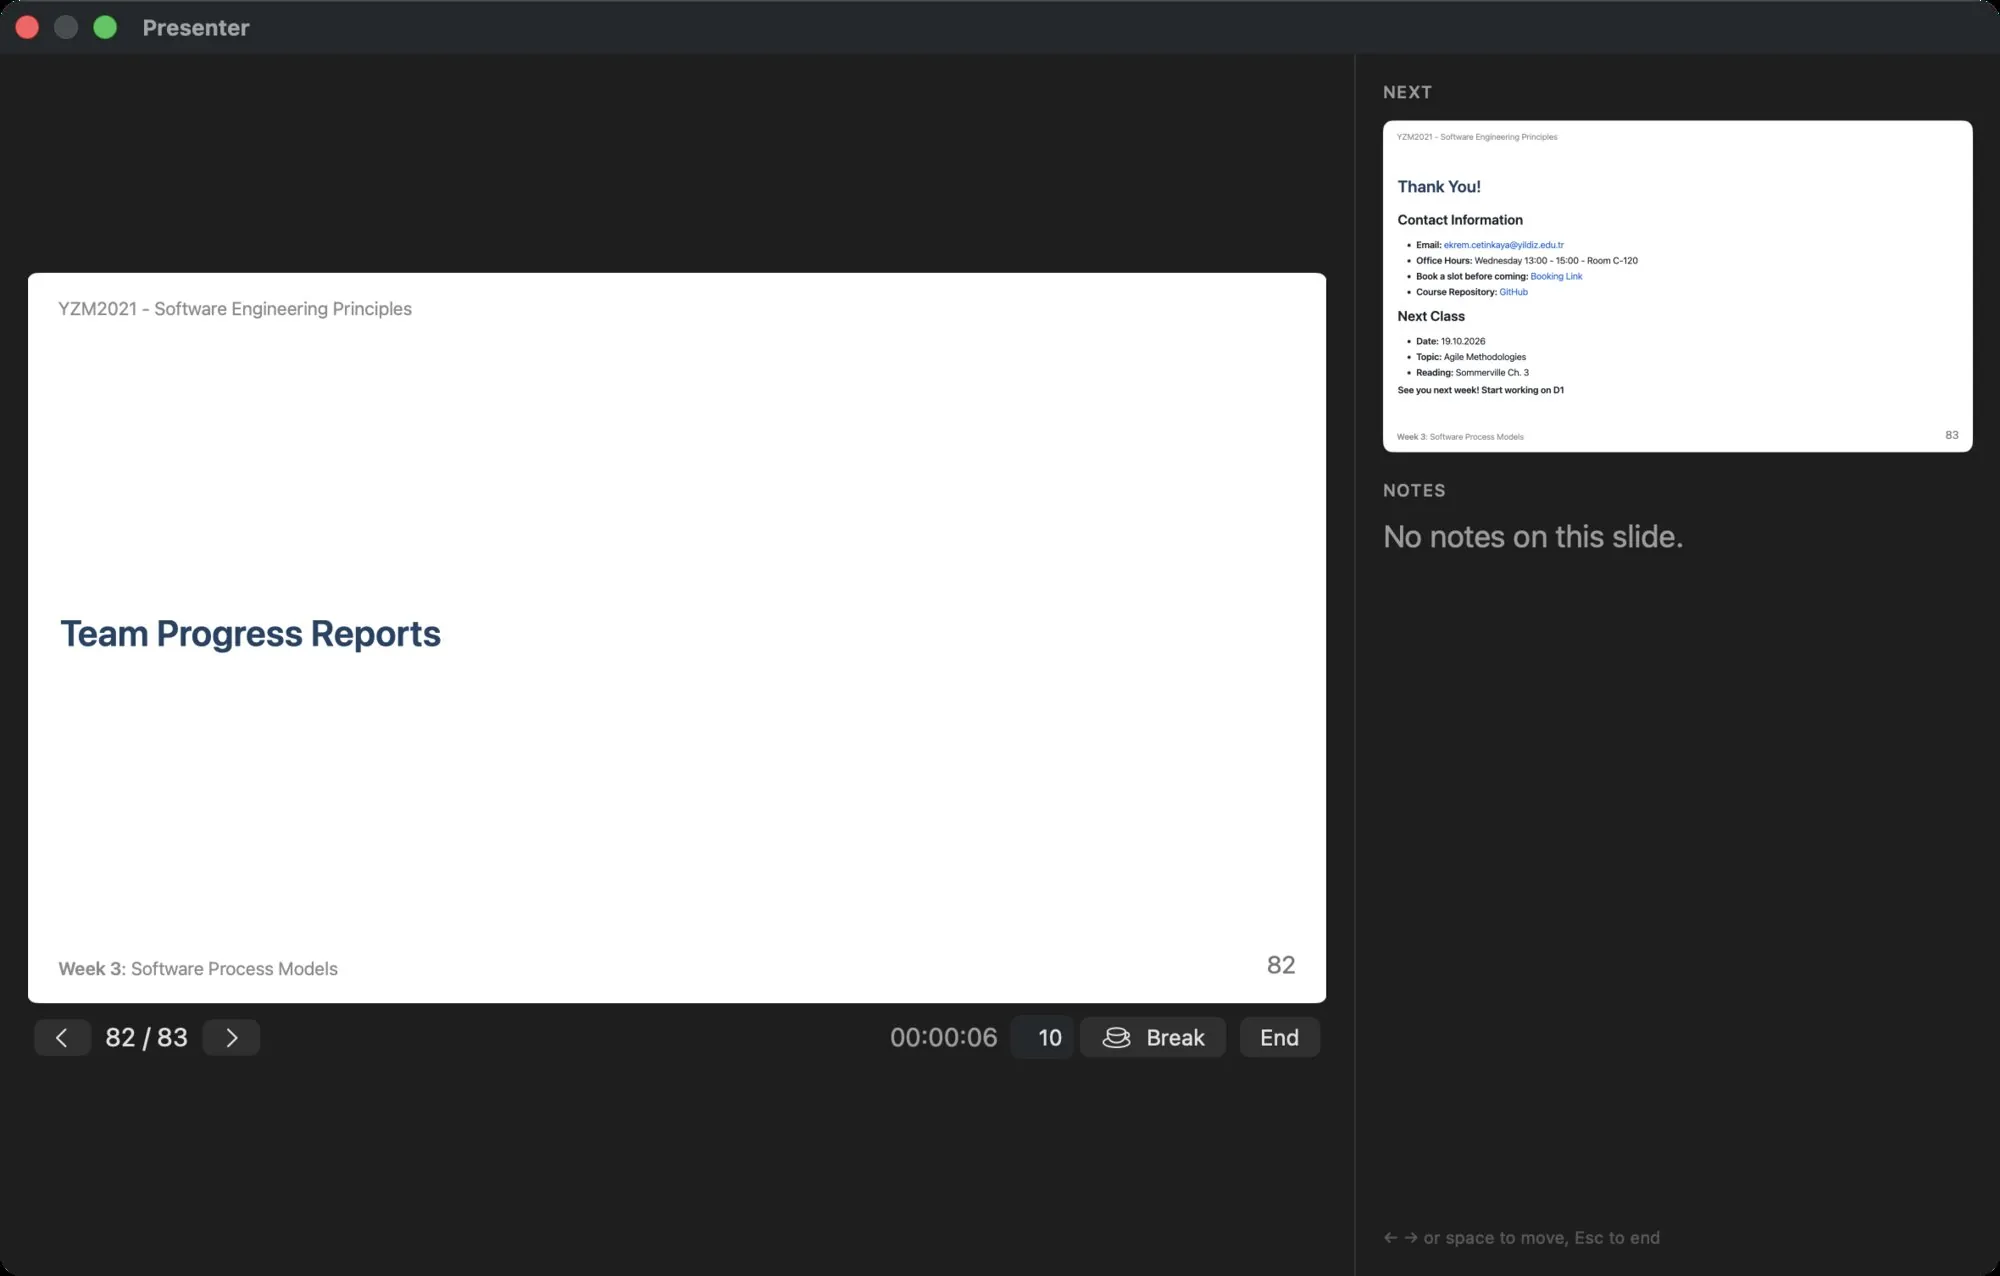
The presenter window#
| Area | What it shows |
|---|---|
| The slide | The current slide, as the audience sees it. |
| ‹ N / M › | Previous, the position, next. |
| Clock | Time since the presentation started. |
| Format menu and Timer | The lecture format this lecture runs — its name and symbol — and the countdown to the next break; see below. |
| Minutes field and Break, Auto break | A break countdown on the audience screen; see below. |
| End | Ends the presentation (⎋). |
| NEXT | The next slide, or Last slide. |
| NOTES | The current slide's speaker notes in large type, or No notes on this slide. |
Moving through the slides also moves the preview and the editor in the main window, so the workspace is at the right slide when the presentation ends.
Keys#
While presenting, these keys work whichever window is in front:
| Key | Action |
|---|---|
| →, ↓, Space, Page Down, ↩ | Next slide |
| ←, ↑, Page Up | Previous slide |
| ⎋ | End the presentation |
| ⌘B | Start a break, or end the running one |
A presenter remote that sends page-down and page-up, or the arrow keys, works without setup. →, ←, ⎋, ⌘B and the lecture timer's key can be changed in Settings › Shortcuts; the buttons show the key they carry.
Breaks#
A lecture runs a format: a name such as Pomodoro, a symbol, and its rhythm — teaching and break minutes in the order you teach them, 20 5 20 15 by default: twenty minutes on, five off, twenty on, fifteen off. The format menu next to Timer names the one this lecture runs; pick another one there for a single lecture, and keep the list and the default in Settings › Teaching. Timer starts walking the rhythm, and the presenter window shows where the lecture is: Block 1 of 2 · Break in 12:34.
With Auto break ticked, a block that runs out puts the break up on the audience screen by itself for the minutes the rhythm gives it, and the break's end arms the next block; after the last break the rhythm starts again, so a three-hour slot keeps its pace. With it off the block still counts down and you take the break when you are ready.
A break of your own is still a button away: type the minutes into the field next to Break (10 by default) and press Break or ↩. A break you start in the middle of a block gives the block back the seconds it had left when the break ends; a block that ran out is spent, so the rhythm moves to the next one.
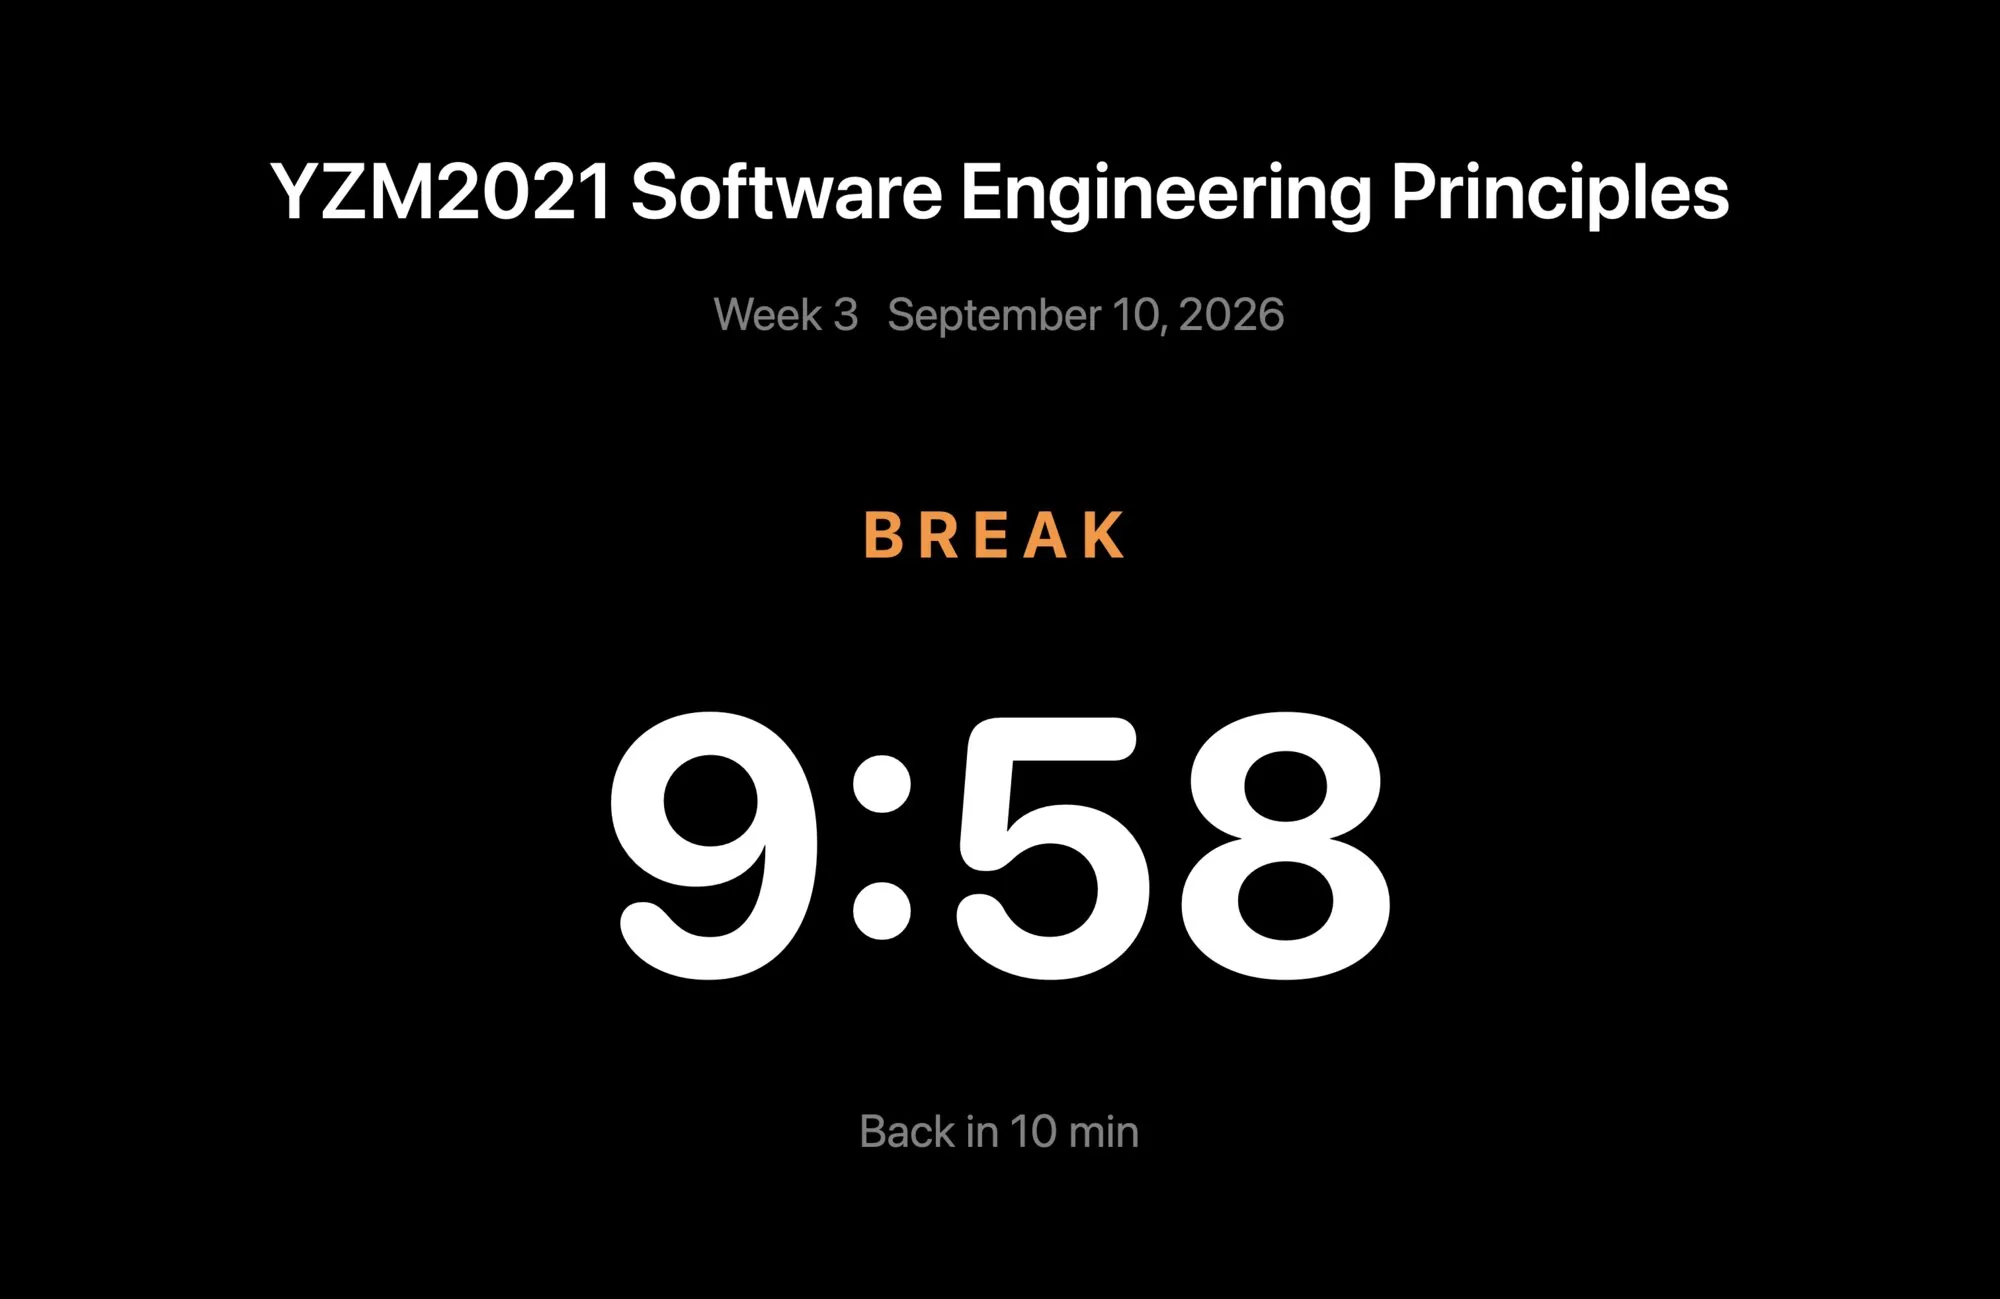
The audience screen switches to a break card with the course title, the unit, today's date, the word BREAK, a large countdown and Back in N min. At zero it says Welcome back and returns to the slide three seconds later on its own.
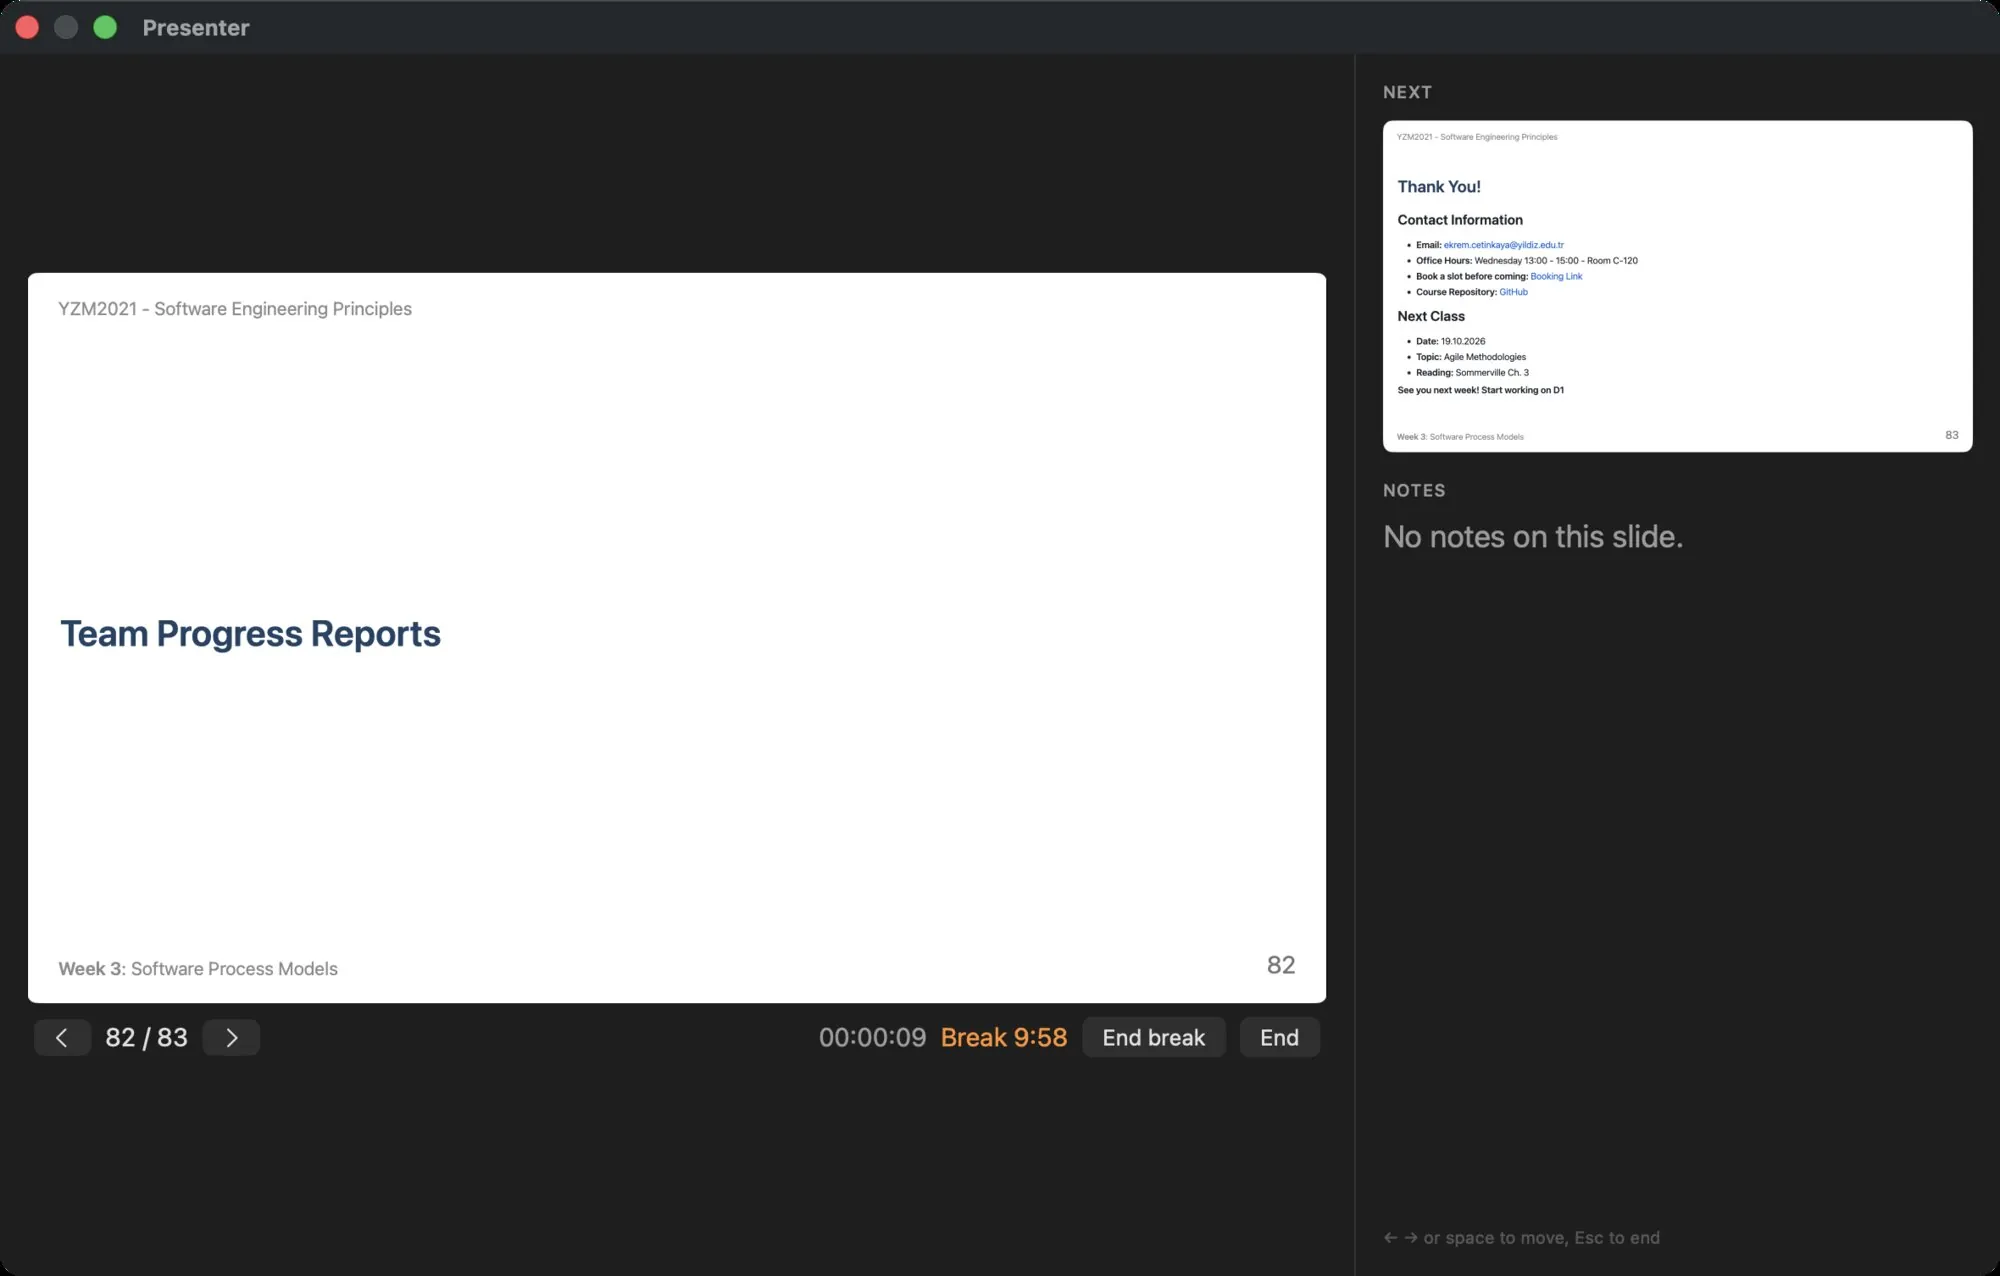
In the presenter window the control becomes an orange Break M:SS counter and an End break button, which ends the break early.
One screen#
With a single screen there is nowhere to put the presenter window without covering the slide, so the slide takes the screen and the presenter window waits. The menu bar and the Dock hide but come back when the pointer reaches the edge, ⌘Tab brings another app in front of the slide as usual, and ⌘Tab back returns to it.
Move the pointer to the bottom of the slide and a control strip appears there: ‹ N / M ›, the clock, the format menu, Timer, Auto break, the minutes field and Break, Notes and End. It stays while the pointer is near the bottom or on the strip, and hides a few seconds after the pointer leaves; the pointer hides with it. When the screen is mirrored the audience sees the strip too, so it stays out of the way until asked for.
Notes on the strip, or Present › Show Presenter Window, opens the presenter window over the slide, with the next slide and the speaker notes; Hide notes, the same menu item or the window's close button puts it away again without ending the presentation.
The keys and ⌘B work as on two screens.
Ending#
End, ⎋, Present › End Presentation or closing the presenter window (on two screens) ends the presentation, closes the audience window and restores the menu bar and Dock.